Thursday, September 15, 2011

Mini Canvases with Shimmerz and Gesso

I have a new tutorial up for Shimmerz!


Thursday, May 5, 2011

Canvas Art Board Album Cover with Coloringz


It's been a while since I posted here on my tutorial blog, but I am in the process of dumping a lot of tutorials here, mostly videos now girls! 

This is my latest using Shimmerz Coloringz - a brilliant product.


From the Shimmerz Ed Vlog:
I am in LOVE with Coloringz.  The colors are so VIBRANT and just work so well together, and the blending is fantastic.  So are you surprised that again, I am using them in this month's video?

For this video, I used 3 Coloringz , 1 Pearlz and stamps. 


Hope you enjoy!


Video tutorial by Lesley Langdon.

Tuesday, March 22, 2011

Sachet Scented Pillow Tutorial


These are pictures of the project made in Episode #3! of UnityTV which aired Monday, March 21st.  If you watch it on You Tube, go ahead and subscribe to the UnityTV channel (UnityStampCoTV), because the videos will just keep coming! 


And here is Episode #3 of UnityTV:


SUPPLY LIST:
Unity Stamps: Iron Orchid Designs - Carte Postale (Postcard, Bird)
Mist: Shimmerz Spritz (Purple Passion)
Ink: Staz-on (Royal Purple and Timber Brown) by Tsukineko
Trim: May Arts
Button: My Mind's Eye
Seam Binding: Scrapnkris ETSY Store
Other: Canvas (fabric store), Sewing Machine, Needle & Thread, Cotton, Dried Lavendar, Lavendar Essential Oil, Cheesecloth


Sunday, March 20, 2011

Stamping with Coloringz, Unity Stamp Co UnityTV

See those chandeliers and that repeated fourish on top?  That is all in the video below that I created for UnityTV featuring Marah Johnson's Breathless set.

The reason this looks so cool - COLORINGZ by Shimmerz (Acnhor's Away).  It's new and VERY awesome to work and stamp with.


And here is the video:

Have a great day and happy crafting!

Friday, February 11, 2011

LARGE SPRITZED AND STAMPED CANVAS FLOWER

Here is a picture tutorial for you!  A very easy project that requires you to have a sewing machine (to sew the ribbon for the edging).  If you don't sew, just omit the ribbon edging or sew it with a needle and thread!


Click on the images to enlarge them and to see the directions.


Stitch the top and pull tight to form a flower.


Adhere a pre made flower for the center, stitching it in place.


Here is a close up of the Shimmerz spritzed canvas and that cute bicycle stamp from Unity Stamp Co (Melody Ross Collection).


I finished off the back with a piece of fabric that was die cut with a circle die cut from Spellbinders. See that FAUX suede leaf ribbon from May Arts?  Cute isn't it!  I used my Glue Gun from Glue Arts to adhere the fabric circle.


Tuesday, February 8, 2011

FABRIC HEART ART Video Tutorial

Want to use up some of your stash?  Watch the video, get messy and create a piece of art for your craft room!


SUPPLIES:
Shimmerz Paints Products:
Red-y or Not Vibez
Pop Art Pink Vibez
Razzle Dazzle Berry Vibez
Cotton Candy Spritz
Barn Door Spritz
Eucalyptus Spritz
Licorice Spritz
Jeni B Bleu Vibez

Other Supplies:
Unity Stamp Co. Stamps (Just Be You)
Gesso Paint (Ranger)
Mod Podge (Matte)
Canvas on Frame (11x14)
Fabric (white cotton)
Staz-on Jet Black by Tsukineko
Metallic Pen (Silver)
Hottie Pink Shimmerz Blingz (to cover up mistakes)
Blue By You Shimmerz Pearlz (chipboard letters, some on top of Gesso)
Prima Flowers, Leaves, and Flower Packaging (white words on plastic)
Metal Keyhole (Tim Holtz)
Hemp Cord
Glue Arts Hot Glue Gun
My Mind's Eye Brad
7 Gypsies Chipboard Letters (Create)
Basic Grey Chipboard Letters (from, the)
Stardust Stickles (Ranger)
Gems: Queen & Co.
Metal Watch Container Top with Glass
Metal Wing
Metal Corners (Lee Valley)


Tuesday, January 11, 2011
GESSO, CANVAS, CHIPBOARD and SHIMMERZ

I think it's a beautiful marriage!  This tutorial is EASY.  It involves taking a Punky Sprouts canvas album cover (or any canvas), applying chipboard letters (or other chipboard shapes), and treating it with coats of Gesso and beautiful Shimmerz products.

I want to do this AGAIN!  I want to use up my CHIPBOARD!  I can use any CHIPBOARD shapes in my possession!  You can also throw in some buttons or metal, or fabric, you name it!


Here is the video - I hope you enjoy it, and most of all, I hope you try it!  Spell any WORD you want!


Penny Pincher Vibez
Sea Monkey Vibez
Licorice Spritz
Eucalyptus Spritz
Tickle Me Turquoise Shimmerz Paint

Other Supplies:
Gesso Paint
Punky Sprouts Canvas Album Cover (Rebel Sprout Album)
American Crafts Thickers (Assorted)
Glue Arts Glue Gun


Have a wonderful and creative journey!

Monday, January 3, 2011

Framed Art - WITH SHIMMERZ AND UNITY!


Below is a video on how to make your own little pieces of stamped art!
Shimmerz Products Used in this Video:
Tickle Me Turquoise Shimmerz
Key Lime Shimmerz
Golden Wheat Shimmerz
Blue by U Pearlz
Jeni B Bleu Vibez

Other Supplies:
Stamps - Unity Stamp Co. (Donna Downey)
Ink - Ranger Black Soot
Paper - 140 Pound Watercolor Paper
Tools - paint brush, heat gun, black pen


Bye for now!  Happy crafting!

Friday, December 3, 2010

SHAKER CARD TUTORIAL

See it here!  EASY!  I promise!

You will need a sheet of foam, 2 die cuts and a die cut machine.


ALTERNATIVE: If you want to use sparkle or beads, place the U-Cut-It square on the paper first, sprinkle in the filling, then apply your frame.

Supplies:
Adhesive: Glue Arts U Cut It Foam
Paper: Crate Paper Restoration Line (chipboard, stickers, paper)


Thanks for stopping by!

Tuesday, October 19, 2010

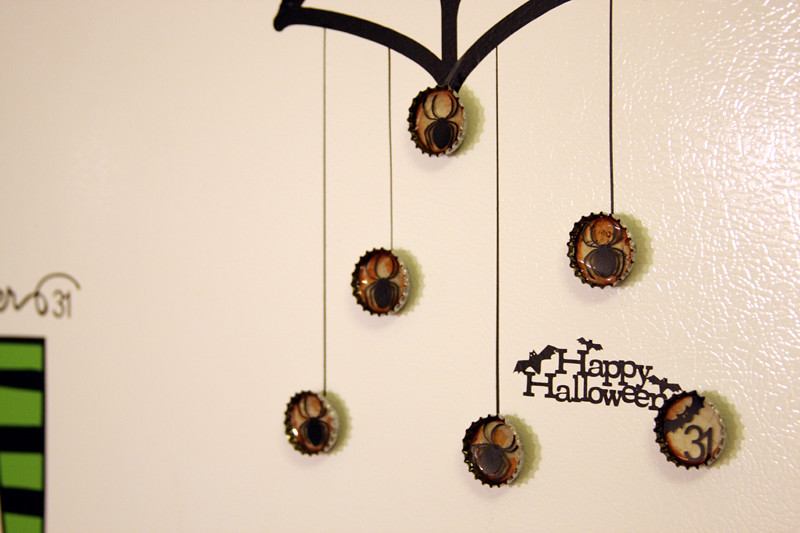
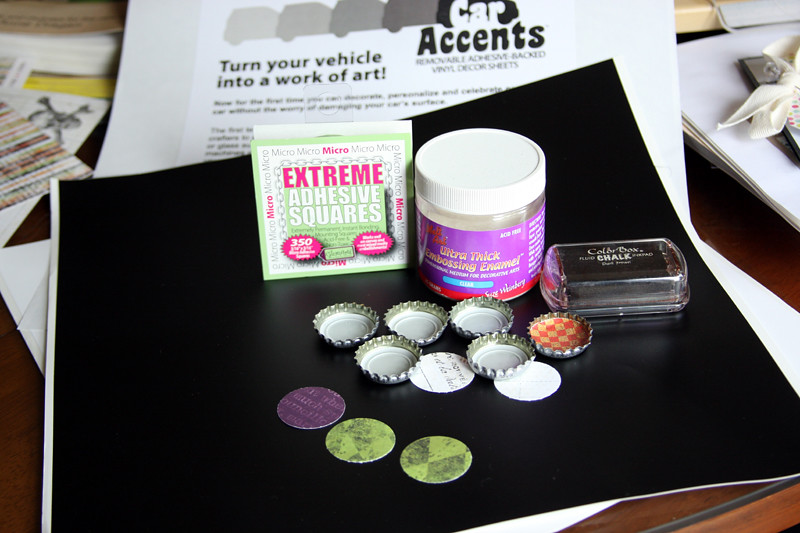
BOTTLE CAP MAGNETS


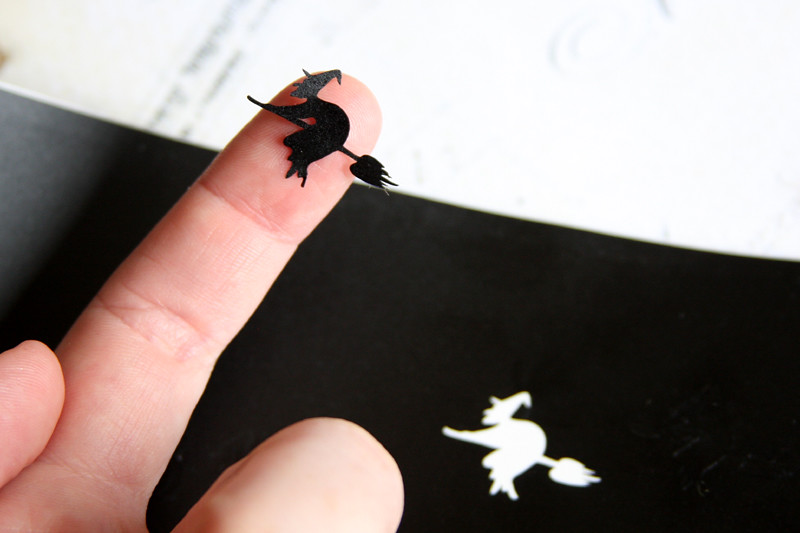
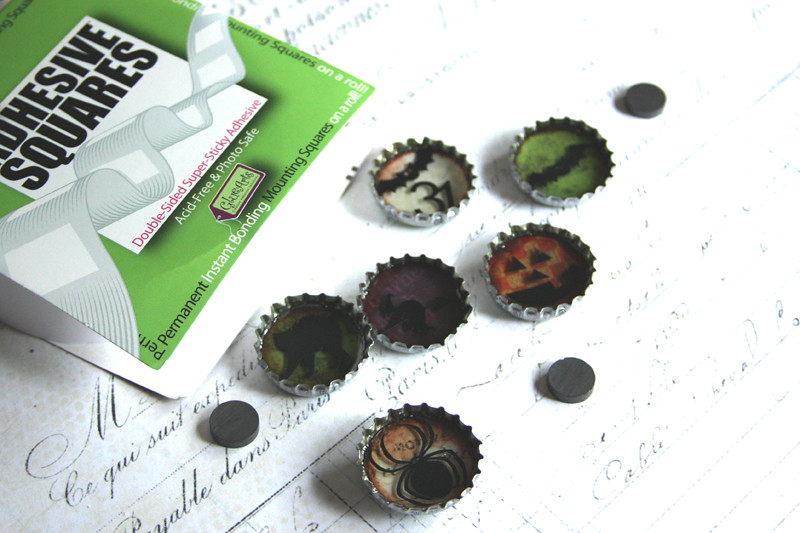
I own a Silhouette Die Cut Machine (electronic, cuts from software on the computer).  It's a wonderful invention!  Car Accents is a vinyl made by Glue Arts and comes in all colors!  They are 12x12 sheets, which can be cut to fit into the Silhouette machine.  You can use the "cut piece" as well by placing it on the cutting matte.  This tutorial can be applied to any season or theme, the shapes are endless.  Keep in mind that your shapes should be no larger than 1", so intricate designs may not work that well.

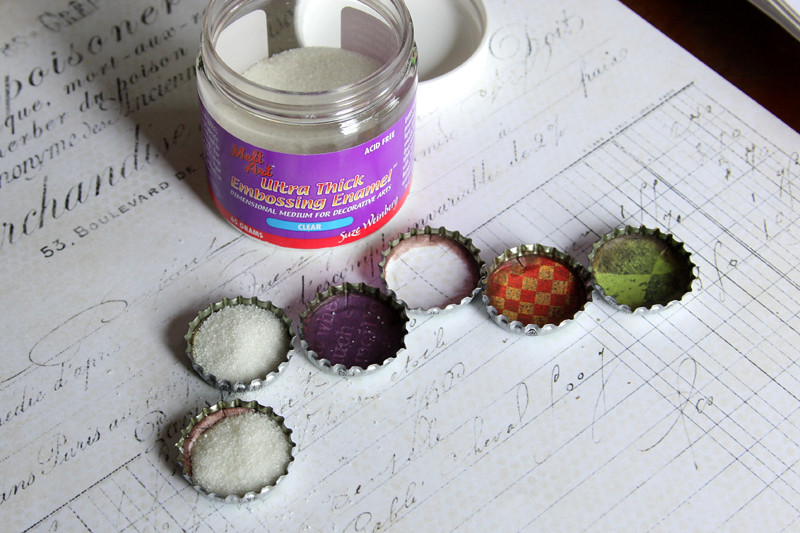
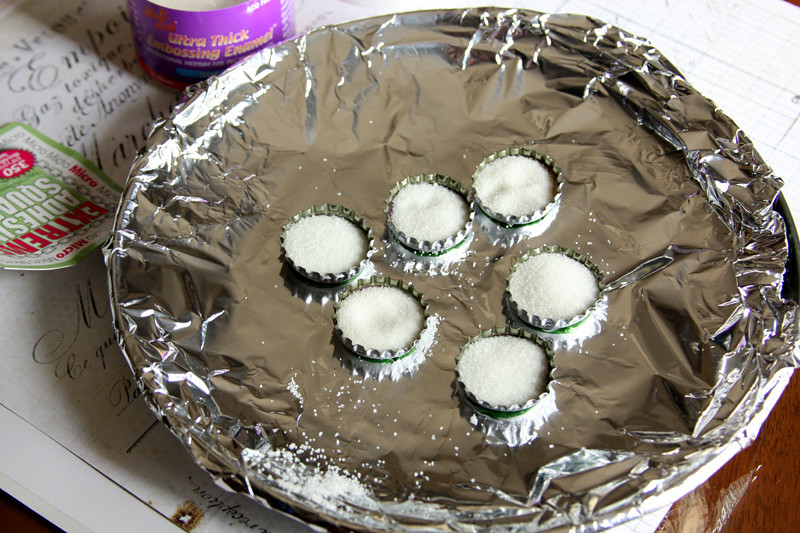
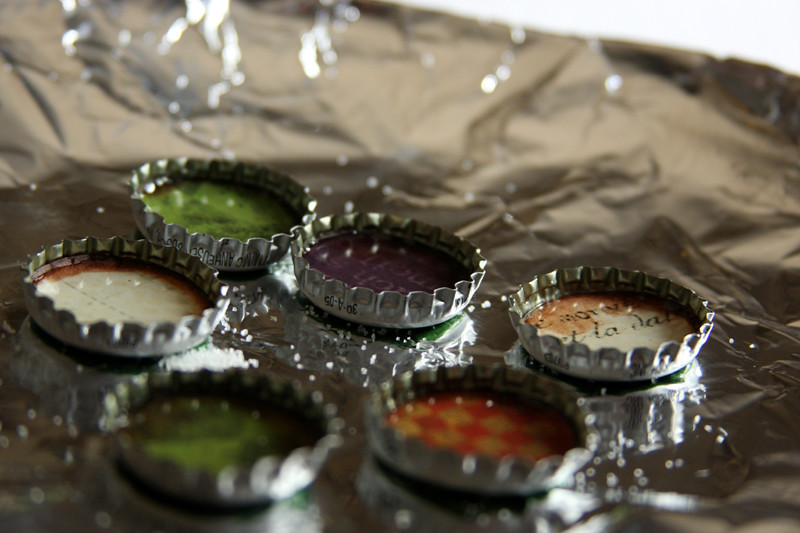
The pictures below are in order of HOW TO.

Supplies:
Glue Arts Car Accents (Blackout)
Glue Arts Extreme Micro Adhesive Squares
Glue Arts Adhesive Squares
Bottle Caps
Magnets
UTEE (Ultra Thick Embossing Enamel) by Ranger Industries
Patterned Paper
1 1/8 inch Hole Punch
Ink (Dark Brown)
Silhouette Die Cut Machine
Halloween Die Cut Files
Tin Foil
Toaster Oven

Instructions:
1. Run Glue Arts Car Accents vinyl through your die cutting machine to cut out 1 inch Halloween images.
2. Punch round patterned paper circles, ink around edges.
3. Adhere paper inside the bottle caps with Glue Arts Extreme Micro Adhesive Squares.
4. Pour UTEE inside each bottle cap, place on plate covered in tin foil, heat set in toaster oven (approximately 5 minutes on broil – watch carefully).
5. Let cool and apply Car Accents Halloween images.
6. Adhere magnets to the back side of the bottle cap with Glue Arts Extreme Adhesive Squares.


HAVE FUN!

Thursday, September 9, 2010

Misting and Stamping with Unity Stamps!

Over on Unity Stamp Company's Blog, there is a tutorial that I created using UNITY STAMP CO. stamps and Glimmer Mists.  You can see it here too!

SUPPLIES: 
Stamps:  Free to Be (Birdcage) and She Sprouted Wings (sentiment)
Mists: Glimmer Mists by Tattered Angels (Lime Twist, Turquoise, and Winter Pine)
Inks:  Broken China and Walnut Stain Distress Inks
Paper: Photo Paper (Glossy for Inkjet)
Other: Brayer, Tin Foil, Glimmer Mist Cap, 8.5 x 11 Heavy Paper


Hope you enjoyed the video!

Wednesday, September 1, 2010

Stamped Fabric Postcard Tutorial

I love working with products that allow me to add color to an otherwise boring piece of white paper, lace or fabric.  Below, I have my VERY FIRST video tutorial (about 3 minutes in length) on stamping on fabric and applying some color with Shimmerz Spritz and Paint.  Hope you like it!  Stay tuned to see how I use it on an upcoming layout....I do have a plan!

Supplies:
Stamp: Unity Stamp Co. (Vintage Postcard)
Mists: Shimmerz (Mud Pie, Eucalyptus)
Paint: Shimmerz Jilted Jade
Other: Cotton Fabric, Black Dye Ink, Paint Brush


Monday, July 5, 2010

LAYERS LAYERS LAYERS!

I created this tutorial for Color Combos Galore, so I'm putting it here too for you all to enjoy, or better yet, come join us for a color challenge and some great tutorials at CCG!

I am consistently inspired by scrapbookers and cardmakers who can lay on the layers, thereby adding incredible amount of details and “hot spots” to look at more closely. Would you like to add more detail to your layouts and create layers of interesting elements? Then read on. It’s not rocket science, but it is finding your “eye” for balance and design.

THE IDEA:
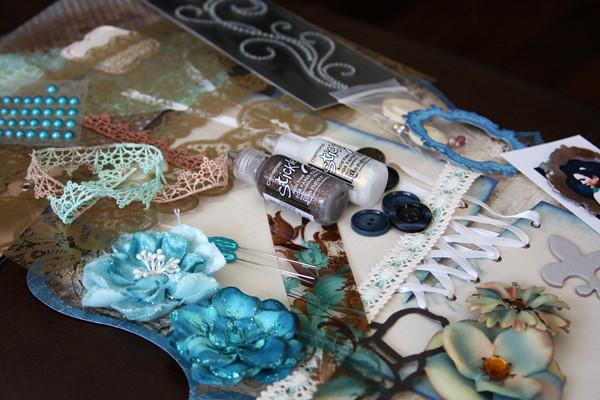
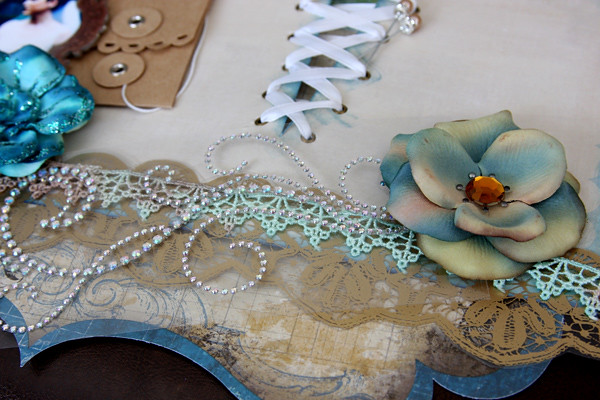
This tutorial is all about the layers, which helps to add detail and dimension to any layout. Just think about it like stacking your supplies, but making sure you can see some elements of each layer.


STEP 1:
Gather your supplies. Start with the base papers and cardstock, and then find scraps of coordinating papers. Gather some ribbons and lace, maybe 2 or 3. Look for matching items like pins and buttons, crystals, and overlays. Then scour your supplies for chipboard, letters, flowers, tools (punches and paper distressing tools), and stickles. You may not use it all in the end, but putting it all together in a pile in front of you will help you through the layering process.

STEP 2:
Now that you have placed all your supplies in front of you, start planning your layout. Create a line across your page that will become your “layer line” and strong focal point.


STEP 3:
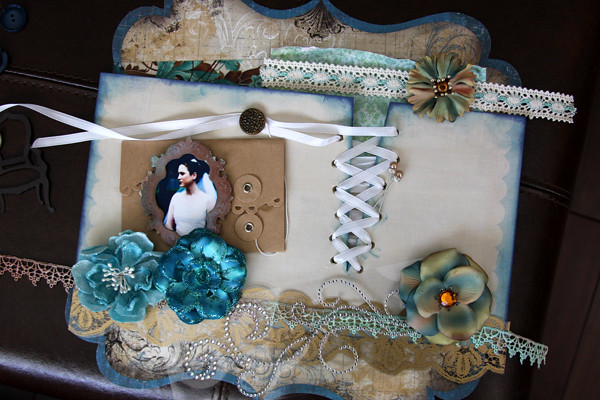
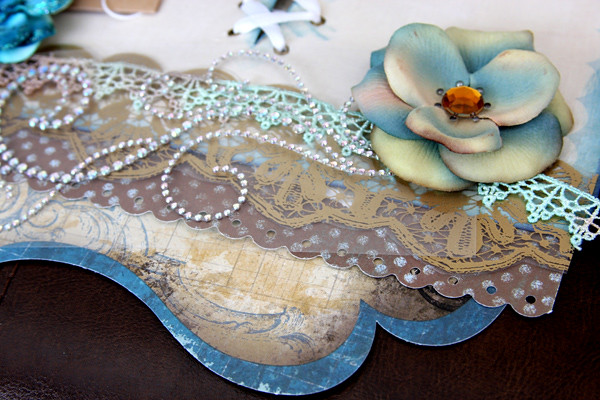
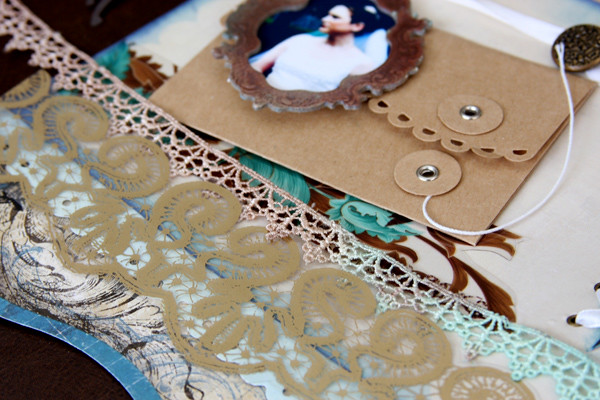
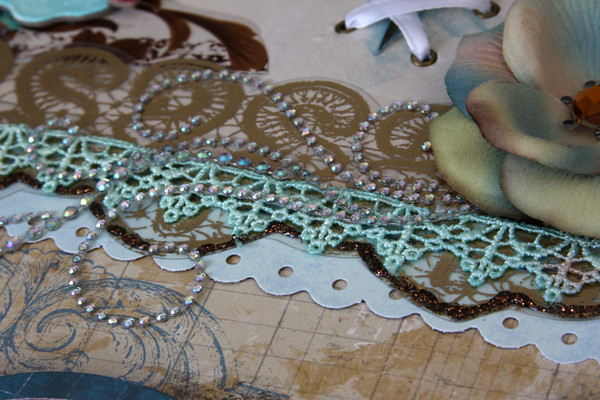
Play with your layers, change it up, add, take away, play until you are happy with the level of detail. In the example above, I started with the BASE paper, then played around with the gold overlay, the lace, crystals, and flowers. But I felt it needed something a little more, so I looked for a paper that I could slip underneath somewhere. When in doubt, add a coordinating patterned paper piece. To add dimension, distress the paper, crumple it, mist it, tear it, or punch it.


Here I added some brown paper which I punch with a SCALLOP punch, but didn’t quite like it, so I flipped it over to its blue side for a lighter more airy feel.


STEP 4:
Settle on your layers, think about cohesiveness:
1. …does it look like each element belongs?
2. …do these layers look beautiful together?
3. …is there anything I could add to make it better (think buttons, flowers, title, pins, etc?


STEP 5:
Glue down all your layers and when it is all adhere to the layout, think about adding some stickles here and there for EXTRA detail.

STEP 6:

Complete your layout by adding all other elements and photos.

LAYERING TIPS:

Great supplies for BASE layers are:
• Ribbons (lace and velvet)
• Papers (crumpled, distressed, misted, punched)
• Overlays/Transparencies

Great supplies for TOP layers are:
• Crystals
• Stickles
• Gems
• Chipboard
• Flowers
• Buttons
• Letters
• Pins

The BEST tip is to scour your supply room in advance looking for items in the Color Combos Galore color palette of the week!


A stunning focal point needs detail – so think about layering AT LEAST 5 items.

Have fun creating gorgeous pieces of layered ART!

Lesley